- Free shipping available on selected products
-

- Shop The Drew & Jonathan Home™ Collection +


-
-
- Drew & Jonathan Home™ Flutto® Valley Oak Flexible Tambour Panels
- Drew & Jonathan Home™ Flutto® Valley Walnut Flexible Tambour Panels
- Drew & Jonathan Home™ Ultraflex Engineered Oak Lightweight Flexible Wood Wall Panels
- Drew & Jonathan Home™ Ultraflex Engineered Walnut Lightweight Flexible Wood Wall Panels
- Drew & Jonathan Home™ Grainmatch Oak
- Drew & Jonathan Home™ Grainmatch Walnut
- Drew & Jonathan Home™ White Wood Acoustic Slat Wall Panel
- Drew & Jonathan Home™ Gray Oak Acoustic Slat Wall Panel
- Drew & Jonathan Home™ Smoked Oak Acoustic Slat Wall Panel
- Drew & Jonathan Home™ Grainmatch Acoustic Slat Wall Panel Sample Box
- Drew & Jonathan Home™ Acoustic Slat Wall Panel Sample Box
-
- Flutto™ Black Mini-Ridge Flexible Panels
- Flutto™ Blue Mini-Ridge Flexible Panels
- Flutto™ Gray Mini-Ridge Flexible Panels
- Flutto™ White Mini-Ridge Flexible Panels
- Flutto™ Black Ridge Flexible Panels
- Flutto™ Blue Ridge Flexible Panels
- Flutto™ Gray Ridge Flexible Panels
- Flutto™ White Ridge Flexible Panels
- Flutto™ Black Slat Flexible Panels
- Flutto™ Gray Slat Flexible Panels
- Flutto™ White Slat Flexible Panels
-
-
-
- Plaank™ Exterior Composite Fascia Boards
- Plaank™ Black Joist Screws for Slat Wall Panels
- Plaank™ Exterior Slat Corner Trims
- Plaank™ Exterior Slat Fitted Corner Trims
- Plaank™ Screws for Exterior Slat Wall Panels
- Plaank™ Silver Aluminium Joists for Exterior Slat Wall Panels
- Plaank™ Silver Expansion Screws for Exterior Slat Wall Panels
-
-
-
-
- Ledge Shelf Large | Panel Accessories by Slatpanel®
- Ledge Shelf | Panel Accessories by Slatpanel®
- Shelf With Four Hooks | Panel Accessories by Slatpanel®
- Shelf With Four Pegs | Panel Accessories by Slatpanel®
- Black 3D Hook (2pk) | Panel Accessories by Slatpanel®
- Black Wine Rack (2pk) | Panel Accessories by Slatpanel®
- Slatpanel® Screws for Exterior Composite Slat Wall Panels
- Samples
- Sale
Most popular products
-

Luxury Smoked Oak Acoustic Slat Wood Wall Panels
From
$124.99$87.49 -

Luxury American Oak Gray Felt Acoustic Slat Wood Wall Panels
From
$114.99$80.49 -

Black Color Matte Acoustic Slat Wall Panels
From $109.99




Browse wall paneling
- Acoustic Slat Wood Wall Panels
- Acoustic Slat Color Wall Panels
- Drew & Jonathan Home™ x WVH®
- ALMA Collection
- Acoustic Luxe Slat Wall Panels
- Flutto® Flexible Tambour Wood Panels
- Flutto® Flexible Tambour Color Panels
- Fluted Tambour Wall Panels
- Plaank™ Outdoor Panels
- Fire-Rated Acoustic Wall Panels
- Waterproof Slat Wall Panels
- Lightweight Geometric Wood Panels
- Installation Tools and Accessories
Most popular in wall paneling
View All-
Luxury American Oak Gray Felt Acoustic Slat Wood Wall Panels
From
$114.99$80.49 -
Luxury Smoked Oak Acoustic Slat Wood Wall Panels
From
$124.99$87.49 -
Black Color Matte Acoustic Slat Wall Panels
From $109.99
-

Dusty Gray Color Matte Acoustic Slat Wall Panels
From $109.99
-

Flutto® Oak Mini-Ridge Flexible Tambour Wood Panels
From $174.99


Acoustic Slat Wood Wall Panels
Shop all-
Luxury Smoked Oak Acoustic Slat Wood Wall Panels
From
$124.99$87.49 -
Luxury American Oak Gray Felt Acoustic Slat Wood Wall Panels
From
$114.99$80.49

Acoustic Slat Color Wall Panels
Shop all-
Black Color Matte Acoustic Slat Wall Panels
From $109.99
-
Dusty Gray Color Matte Acoustic Slat Wall Panels
From $109.99
-

Midnight Blue Color Matte Acoustic Slat Wall Panels
From
$109.99$76.99 -

Snow White Color Matte Acoustic Slat Wall Panels
From
$74.99$52.49 -

Slatpanel® Luxe Gray Wide Slat Wood Wall Panel
From
$259.99$181.99 -

Slatpanel® Luxe Leather Black Wide Slat Wood Wall Panel
$334.99$234.49 -

Slatpanel® Luxe Blue Wide Slat Wall Panel
From $274.99
-

Slatpanel® Luxe Black Wide Slat Wall Panel
From $284.99


Acoustic Luxe Slat Wall Panels
Shop all-
Slatpanel® Luxe Black Wide Slat Wall Panel
From $284.99
-
Slatpanel® Luxe Blue Wide Slat Wall Panel
From $274.99
-
Slatpanel® Luxe Gray Wide Slat Wood Wall Panel
From
$259.99$181.99 -
Slatpanel® Luxe Leather Black Wide Slat Wood Wall Panel
$334.99$234.49



Flutto® Flexible Tambour Wood Panels
Shop all-
Flutto® Oak Mini-Ridge Flexible Tambour Wood Panels
From $174.99
-

Flutto® Oak Ridge Flexible Tambour Wood Panels
From $174.99
-

Flutto® Oak Slat Flexible Tambour Wood Panels
From $174.99
-

Flutto® Walnut Ridge Flexible Tambour Wood Panels
From $174.99
-

Flutto® Walnut Slat Flexible Tambour Wood Panels
From $174.99


Flutto® Flexible Tambour Color Panels
Shop all-

Flutto® Black Mini Ridge Flexible Tambour Panels
From
$174.99$122.49 -
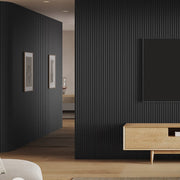
Flutto® Black Ridge Flexible Tambour Panels
From $144.99
-

Flutto® White Slat Flexible Tambour Panels
From
$74.99$52.49 -

Flutto® Black Slat Flexible Tambour Panels
From $74.99
-

Flutto® White Ridge Flexible Tambour Panels
From
$174.99$122.49 -

Flutto® White Mini Ridge Flexible Tambour Panels
From $74.99
Fluted Tambour Wall Panels
Shop all-

Walnut Slat Fluted Tambour Wood Effect Wall Panels
$269.99$188.99


Plaank™ Outdoor Panels
Shop all-

Plaank® Black Exterior Slat Wall Panels
From $214.99
-

Plaank® Gray Exterior Slat Wall Panels
From $104.99
-

Plaank® Oak Exterior Slat Wall Panels
From $204.99
-

Plaank® Walnut Exterior Slat Wall Panels
From $204.99
-

Plaank® Birch Exterior Slat Wall Panels
From $204.99


Fire-Rated Acoustic Wall Panels
Shop all-

Slatpanel® Oak Fire-Rated Acoustic Slat Wall Panel
From
$384.99$269.49 -

Slatpanel® Walnut Fire-Rated Acoustic Slat Wall Panels
From
$439.99$307.99 -

Slatpanel® Luxe Plus Oak Fire-Rated Acoustic Wood Wall Panels
From
$549.99$384.99 -

Slatpanel® Luxe Plus Walnut Fire-Rated Acoustic Wood Wall Panels
From
$549.99$384.99


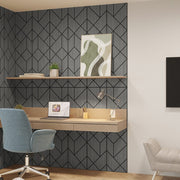


Browse our trending products
Featured
View all-
Luxury American Oak Gray Felt Acoustic Slat Wood Wall Panels
From
$114.99$80.49 -
Luxury Smoked Oak Acoustic Slat Wood Wall Panels
From
$124.99$87.49 -
Midnight Blue Color Matte Acoustic Slat Wall Panels
From
$109.99$76.99 -
Black Color Matte Acoustic Slat Wall Panels
From $109.99
-
Flutto® Oak Mini-Ridge Flexible Tambour Wood Panels
From $174.99
-
Flutto® Oak Ridge Flexible Tambour Wood Panels
From $174.99
-
Flutto® Walnut Ridge Flexible Tambour Wood Panels
From $174.99
Wood Range
View All-
Luxury American Oak Gray Felt Acoustic Slat Wood Wall Panels
From
$114.99$80.49 -
Luxury Smoked Oak Acoustic Slat Wood Wall Panels
From
$124.99$87.49 -
Slatpanel® Luxe Plus Oak Fire-Rated Acoustic Wood Wall Panels
From
$549.99$384.99 -
Slatpanel® Luxe Plus Walnut Fire-Rated Acoustic Wood Wall Panels
From
$549.99$384.99 -
Black Color Matte Acoustic Slat Wall Panels
From $109.99
-
Dusty Gray Color Matte Acoustic Slat Wall Panels
From $109.99
-
Snow White Color Matte Acoustic Slat Wall Panels
From
$74.99$52.49 -
Midnight Blue Color Matte Acoustic Slat Wall Panels
From
$109.99$76.99 -
Slatpanel® Oak Fire-Rated Acoustic Slat Wall Panel
From
$384.99$269.49 -
Slatpanel® Walnut Fire-Rated Acoustic Slat Wall Panels
From
$439.99$307.99

Colored Range
View All-
Black Color Matte Acoustic Slat Wall Panels
From $109.99
-
Dusty Gray Color Matte Acoustic Slat Wall Panels
From $109.99
-
Midnight Blue Color Matte Acoustic Slat Wall Panels
From
$109.99$76.99 -
Snow White Color Matte Acoustic Slat Wall Panels
From
$74.99$52.49 -
Slatpanel® Luxe Black Wide Slat Wall Panel
From $284.99
-
Slatpanel® Luxe Leather Black Wide Slat Wood Wall Panel
$334.99$234.49 -
Slatpanel® Luxe Blue Wide Slat Wall Panel
From $274.99
-
Slatpanel® Luxe Gray Wide Slat Wood Wall Panel
From
$259.99$181.99 -
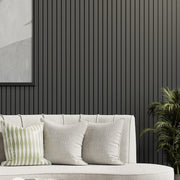
Slatpanel® Luxe Leather Gray Wide Slat Wood Wall Panel
$349.99$244.99



Wide Slat Colored Range
Shop all-
Slatpanel® Luxe Black Wide Slat Wall Panel
From $284.99
-
Slatpanel® Luxe Blue Wide Slat Wall Panel
From $274.99
-
Slatpanel® Luxe Leather Black Wide Slat Wood Wall Panel
$334.99$234.49 -

Slatpanel® Luxe White Wide Slat Wood Wall Panel
From $274.99
-
Slatpanel® Luxe Gray Wide Slat Wood Wall Panel
From
$259.99$181.99 -
Slatpanel® Luxe Leather Gray Wide Slat Wood Wall Panel
$349.99$244.99
Leather Range
Shop all-
Slatpanel® Luxe Leather Black Wide Slat Wood Wall Panel
$334.99$234.49 -
Slatpanel® Luxe Leather Gray Wide Slat Wood Wall Panel
$349.99$244.99
Lightweight Range
Browse our collections
Featured
-
Luxury American Oak Gray Felt Acoustic Slat Wood Wall Panels
From
$114.99$80.49 -
Luxury Smoked Oak Acoustic Slat Wood Wall Panels
From
$124.99$87.49 -
Flutto® Oak Mini-Ridge Flexible Tambour Wood Panels
From $174.99
-
Flutto® Oak Ridge Flexible Tambour Wood Panels
From $174.99
-
Flutto® Oak Slat Flexible Tambour Wood Panels
From $174.99
Slatted Range
Shop all-
Luxury American Oak Gray Felt Acoustic Slat Wood Wall Panels
From
$114.99$80.49 -
Luxury Smoked Oak Acoustic Slat Wood Wall Panels
From
$124.99$87.49
Fluted Range
Shop all-
Flutto® Oak Ridge Flexible Tambour Wood Panels
From $174.99
-
Flutto® Oak Mini-Ridge Flexible Tambour Wood Panels
From $174.99
-
Flutto® Oak Slat Flexible Tambour Wood Panels
From $174.99
-
Flutto® Walnut Ridge Flexible Tambour Wood Panels
From $174.99
-
Flutto® Walnut Slat Flexible Tambour Wood Panels
From $174.99

Fire-Rated Range
-
Slatpanel® Walnut Fire-Rated Acoustic Slat Wall Panels
From
$439.99$307.99 -
Slatpanel® Oak Fire-Rated Acoustic Slat Wall Panel
From
$384.99$269.49 -
Slatpanel® Luxe Plus Oak Fire-Rated Acoustic Wood Wall Panels
From
$549.99$384.99 -
Slatpanel® Luxe Plus Walnut Fire-Rated Acoustic Wood Wall Panels
From
$549.99$384.99
Browse our collections
Featured
View all colored panels-
Black Color Matte Acoustic Slat Wall Panels
From $109.99
-
Dusty Gray Color Matte Acoustic Slat Wall Panels
From $109.99
-
Midnight Blue Color Matte Acoustic Slat Wall Panels
From
$109.99$76.99 -
Snow White Color Matte Acoustic Slat Wall Panels
From
$74.99$52.49 -
Slatpanel® Luxe Leather Black Wide Slat Wood Wall Panel
$334.99$234.49 -
Slatpanel® Luxe Leather Gray Wide Slat Wood Wall Panel
$349.99$244.99 -
Slatpanel® Luxe White Wide Slat Wood Wall Panel
From $274.99
Slatted Range
Shop all-
Black Color Matte Acoustic Slat Wall Panels
From $109.99
-
Dusty Gray Color Matte Acoustic Slat Wall Panels
From $109.99
-
Midnight Blue Color Matte Acoustic Slat Wall Panels
From
$109.99$76.99 -
Snow White Color Matte Acoustic Slat Wall Panels
From
$74.99$52.49 -
Slatpanel® Luxe Black Wide Slat Wall Panel
From $284.99
-
Slatpanel® Luxe Leather Black Wide Slat Wood Wall Panel
$334.99$234.49 -
Slatpanel® Luxe Blue Wide Slat Wall Panel
From $274.99
-
Slatpanel® Luxe Gray Wide Slat Wood Wall Panel
From
$259.99$181.99 -
Slatpanel® Luxe Leather Gray Wide Slat Wood Wall Panel
$349.99$244.99
Wide Slat Range
Shop all-
Slatpanel® Luxe Black Wide Slat Wall Panel
From $284.99
-
Slatpanel® Luxe Blue Wide Slat Wall Panel
From $274.99
-
Slatpanel® Luxe Leather Black Wide Slat Wood Wall Panel
$334.99$234.49 -
Slatpanel® Luxe White Wide Slat Wood Wall Panel
From $274.99
-
Slatpanel® Luxe Gray Wide Slat Wood Wall Panel
From
$259.99$181.99 -
Slatpanel® Luxe Leather Gray Wide Slat Wood Wall Panel
$349.99$244.99
Fluted Range
Shop all-
Flutto® Black Mini Ridge Flexible Tambour Panels
From
$174.99$122.49 -
Flutto® Black Ridge Flexible Tambour Panels
From $144.99
-
Flutto® White Slat Flexible Tambour Panels
From
$74.99$52.49 -
Flutto® Black Slat Flexible Tambour Panels
From $74.99
-
Flutto® White Ridge Flexible Tambour Panels
From
$174.99$122.49 -
Flutto® White Mini Ridge Flexible Tambour Panels
From $74.99
Leather Range
Shop all-
Slatpanel® Luxe Leather Black Wide Slat Wood Wall Panel
$334.99$234.49 -
Slatpanel® Luxe Leather Gray Wide Slat Wood Wall Panel
$349.99$244.99
Browse our accessories
Featured
-

Slatpanel® Glow Flexible LED Light Strip Pack
From $269.99


Glow LEDs
Shop all-

Slatpanel® Glow Flexible LED RGB Light Strip Pack
From $314.99
-
Slatpanel® Glow Flexible LED Light Strip Pack
From $269.99


Introducing Plaank
View all-
Plaank® Black Exterior Slat Wall Panels
From $214.99
-
Plaank® Gray Exterior Slat Wall Panels
From $104.99
-
Plaank® Oak Exterior Slat Wall Panels
From $204.99
-
Plaank® Walnut Exterior Slat Wall Panels
From $204.99
-
Plaank® Birch Exterior Slat Wall Panels
From $204.99
Exterior Composite Panels
Shop all-
Plaank® Black Exterior Slat Wall Panels
From $214.99
-
Plaank® Gray Exterior Slat Wall Panels
From $104.99
-
Plaank® Oak Exterior Slat Wall Panels
From $204.99
-
Plaank® Walnut Exterior Slat Wall Panels
From $204.99
-
Plaank® Birch Exterior Slat Wall Panels
From $204.99
Shipping fees and times
Free shipping available
- We aim to process all orders within 24 hours and for your order to be dispatched within 1-3 days following order placement (excluding weekends and holidays). Upon dispatch of your order, you will receive a notification email with tracking details.
- See more on our
- Shipping policy page
Standard delivery times
- Continental US 5-7 business days
Returns policy
All orders come with a 30 day returns guarantee. We understand that sometimes, a product may not meet your expectations. That's why we offer a simple and straightforward process for returning items to our store. With our easy return policy, you can shop with confidence, knowing that if you're not completely satisfied, we've got you covered. Please start a live chat or give us a call to start your returns process.
Get inspired